Projects administration
Introduction
The Projects administration page can be reached by clicking on the user button on the top-right corner(the one with the symbol of a user) and select "Administration" from the menu. Then, by clicking on the Projects button on the top-left part of the screen, the Projects Page will be shown.
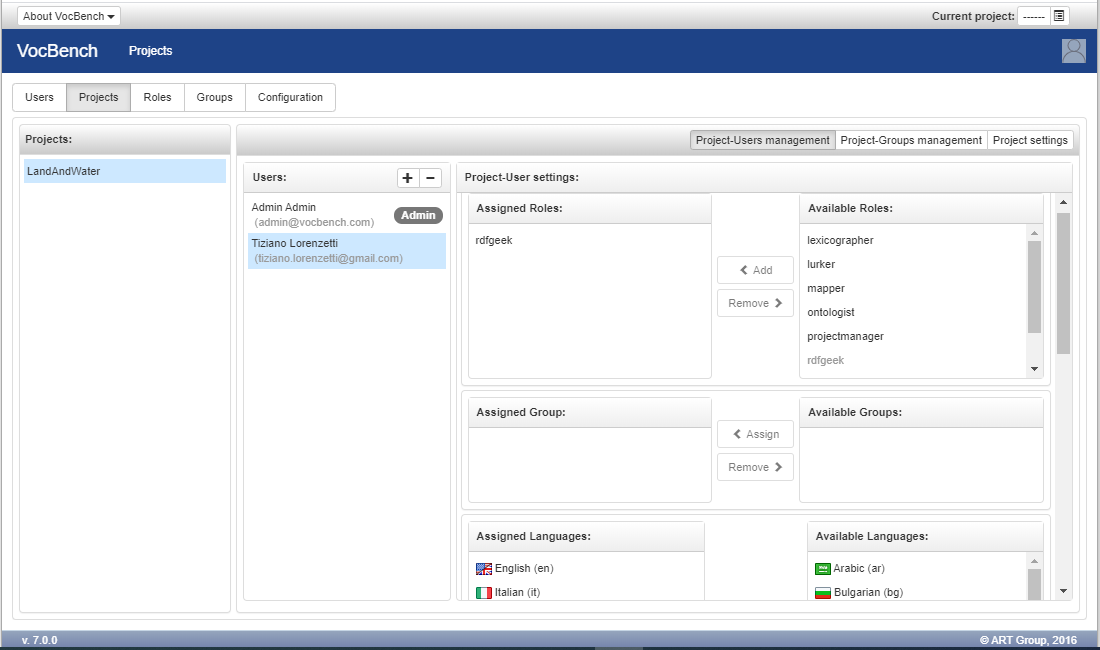
From this page, it is possible to add users to projects, to assign them languages, roles, or to assign them to a group.
Project-Users management
The management of users bound to a project is available by selecting the Project-Users management button on the top right corner of the page.
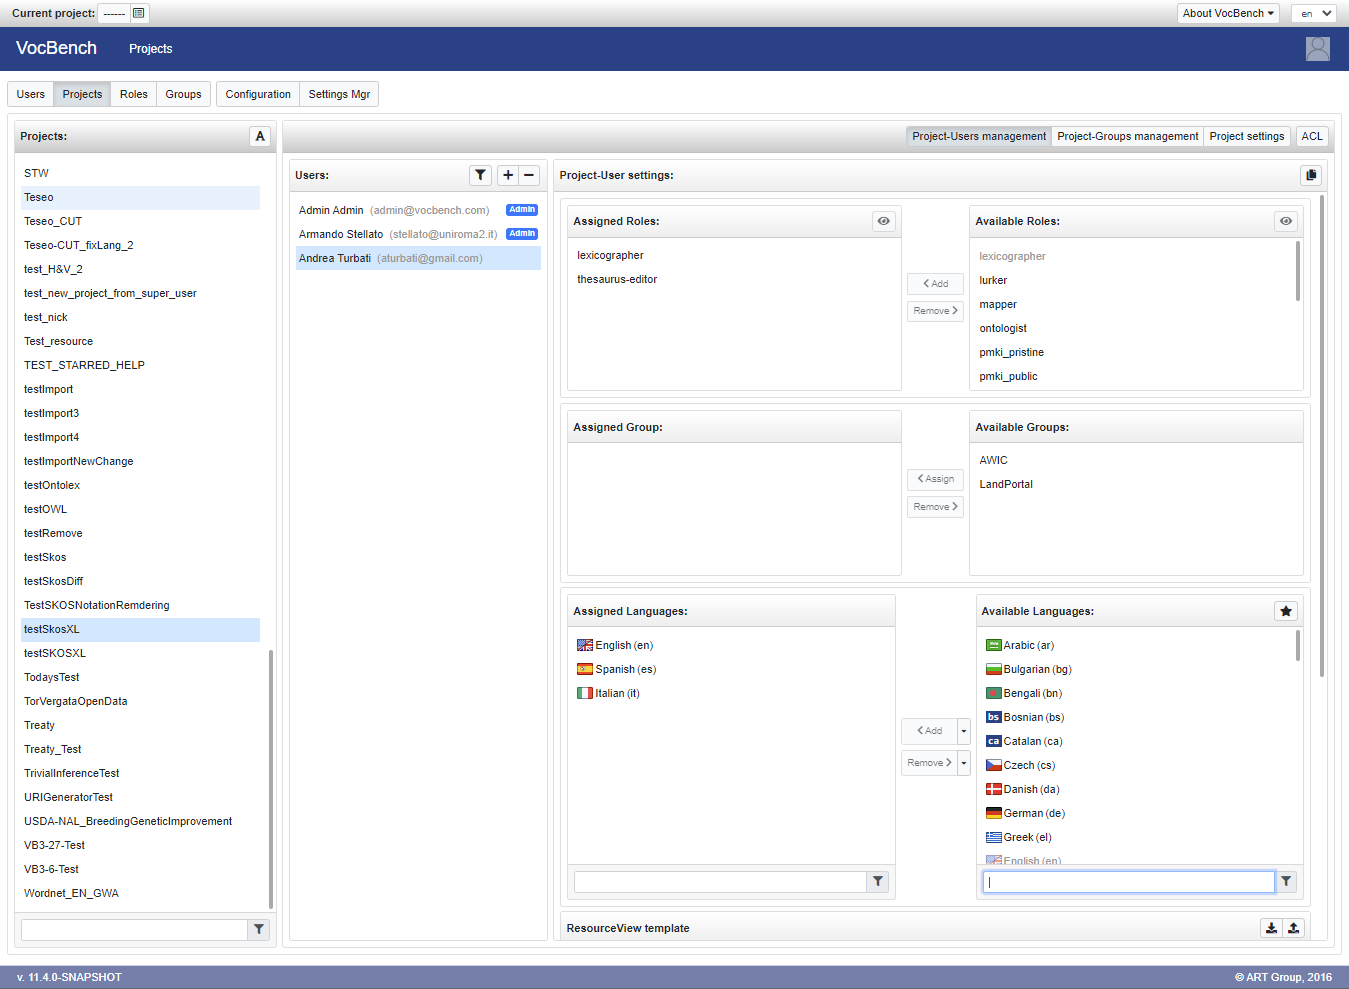
After selecting a project in the dedicated panel, the list of the assigned users is shown in the "Users" panel. From this panel the administrator can add new users or remove those already assigned.
When a user is selected as well, in the right panel "Project-user settings" it is possible to:
- Add/remove roles to the user. The available roles are those defined at system level or locally to the selected project (for further details see the dedicated documentation)
- Assign/remove a group to the user. It is possible to assign just one group among the available ones. The "Apply restrictions" button on the top-right corner of the Assigned Group panel, if active/pressed, tells to the system that the group limitations for the given project must be applied. This means that a group membership doesn't necessarily imply that its limitation (if any) are applied to all the users (for details see the next section Project-Groups management).
- Assign/remove languages to the user. The assignable languages are restricted to those available in the project (see Project settings). The "star" button located on the Available languages panel heading allows you to filter the languages by showing only those indicated by the user as proficiencies in its profile page.
- Customize the ResourceView visualization of the user in the given project (see here for further details)
All these settings can be cloned into a target project through the ![]() button located on the top right corner of the panel.
Once clicked, a dialog will prompt the selection of a target project and then, if submitted, all the above settings will be replicated in it. Roles (except for project-level ones), group, languages and ResourceView template will be overwritten to the already existing settings in the target project (if any).
button located on the top right corner of the panel.
Once clicked, a dialog will prompt the selection of a target project and then, if submitted, all the above settings will be replicated in it. Roles (except for project-level ones), group, languages and ResourceView template will be overwritten to the already existing settings in the target project (if any).
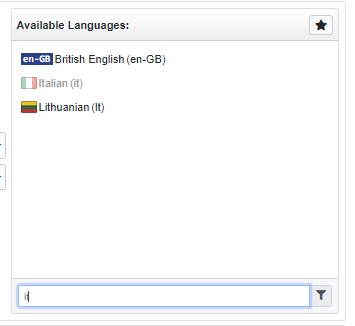
To help the Administrator, or the Project Manager, to assign the right language(s) to a user (for the selected project), it is possible to filter the languages by just using the search box right under the "Available Languages". For example, by using "it" in that search field, only 3 possible languages are shown (the only three languages having the "it" sequence in their name):
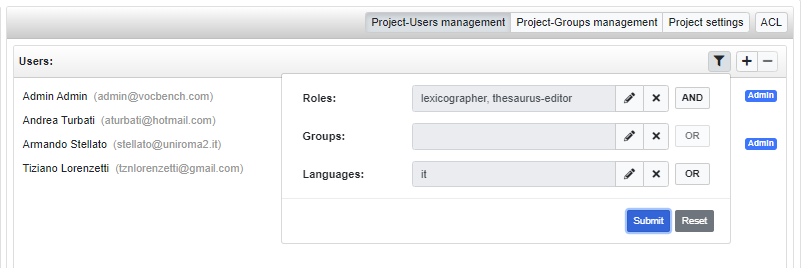
As seen before, by selecting a project, all its associated users are shown near it. This list can be quite long and to know the features of each user, the Administrator/Project Manager needs to click on each user. Another possibility is to use filter option. Click on the "funnel" button and a context dialog will be opened, containing three fields: "Roles", "Groups" and "Languages". By filling one, or more, of these fiels, it is possible to filter the list of users, assigned to the selected project, and show only those users having the desired features (these features can be considered in AND or OR combinations). For example the shown users all have the specified features (e.g. they have the roles "lexicographer" AND "thesaurus-editor" and have the language "it")
Project-Groups management
Other aspect that can be managed from this page is the project-groups binding. The related editor is accessible from the same top-right buttons group of the "Project-Users management".
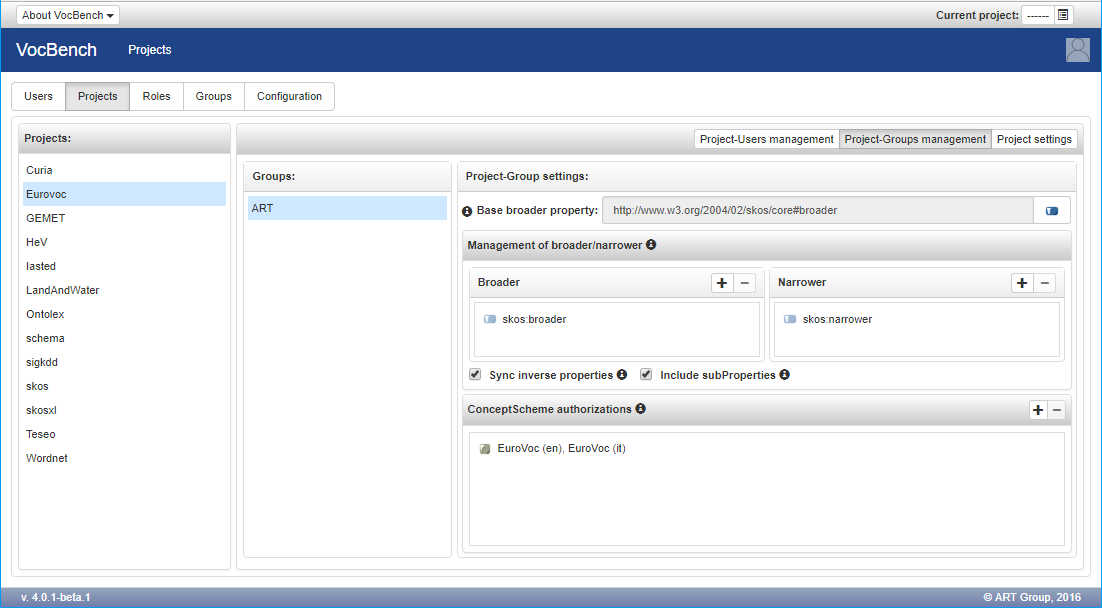
Selecting "Project-Groups management" a list of existing groups is shown. Once a project-user pair is selected, on the left panel their settings are shown. A user can be assigned to a single group per project.
For details on how to create/edit/delete groups, see the dedicated page
A group can be used in order to constrain or limitate the operation that its users can perform on a SKOS thesaurus. In particular it is possible to configure the following:
- Base broader property: sets the base broader property that is selected by default when the user is creating a narrower concept in the concept tree.
- Management of broader/narrower: customizes the properties on which the concept tree hierarchy is based on.
- ConceptScheme authorizations: determines which ConceptScheme the group is authorized to work with.
All these three settings are available only for projects that adopt a semantic model that includes SKOS.
About the ConceptScheme authorizations, any changes on a unauthorized scheme or any of its concepts (according to this configuration) will be denied. For instance, considering the configuration show in the previous figure, a user that belongs to the ART group in the Eurovoc project, cannot add a concept to a scheme different from EuroVoc (en).

Project settings
The third configuration panel available on this page is the "Project settings".
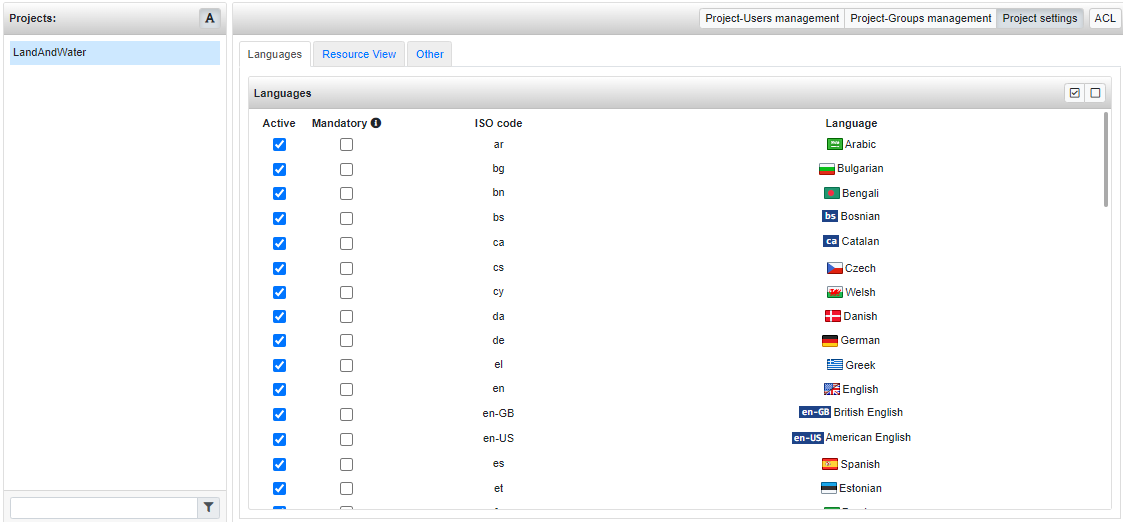
This panel contains three tabs:
- Languages: from here it is possible to select the languages to made available in the project. It is also possible to mark some of them as "mandatory". The mandatory languages are expected to be covered extensively in the dataset. Some features of the platform (e.g. ICV) support verification of this constraint.
- Resource View: allows you to customize the Resource View aspect by changing the templates and defining custom sections. This is documented in details in a dedicated page.
-
Other: a tab containing other generic settings:
-
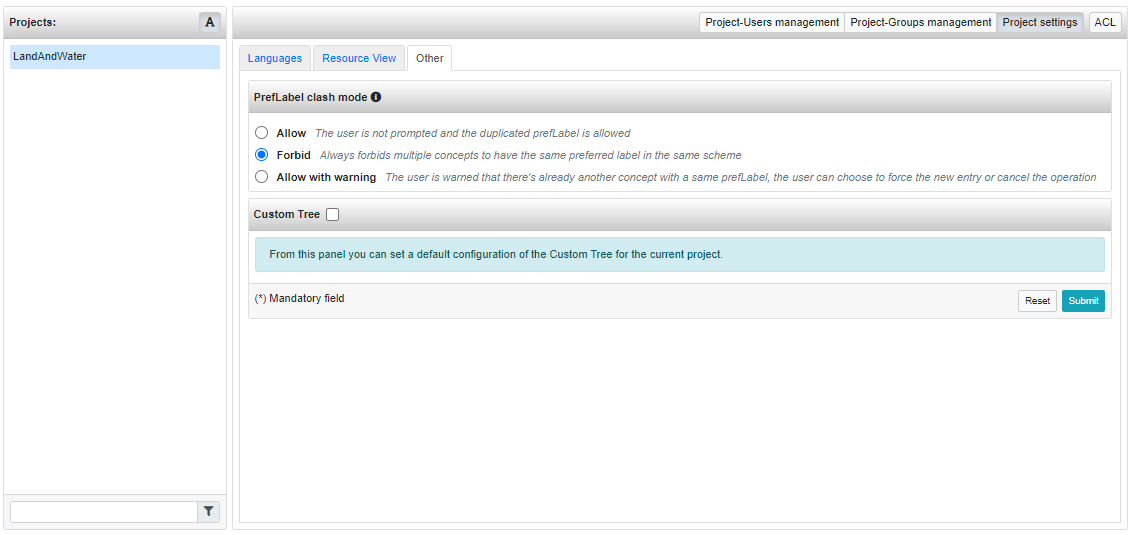
PrefLabel clash mode: this determines how the system should handle the unicity of preferred labels within concept schemes. Three behaviours are available:
- Allow: the user is not prompted and the duplicated prefLabel is allowed
- Forbid Always: forbids multiple concepts to have the same preferred label in the same scheme
- Allow with warning: the user is warned that there's already another concept with a same prefLabel, the user can choose to force the new entry or cancel the operation
- Custom Tree: allows the definition of a custom tree which will be available in the Data page. This is documented in a dedicated page.
-
PrefLabel clash mode: this determines how the system should handle the unicity of preferred labels within concept schemes. Three behaviours are available:
