


The Data View: Editing OWL Ontologies
Intro
This section describes the ontology editing functionalities available in VocBench. We will go through the set of functionalities as they appear in the various elements of the user interface.
The Class Section
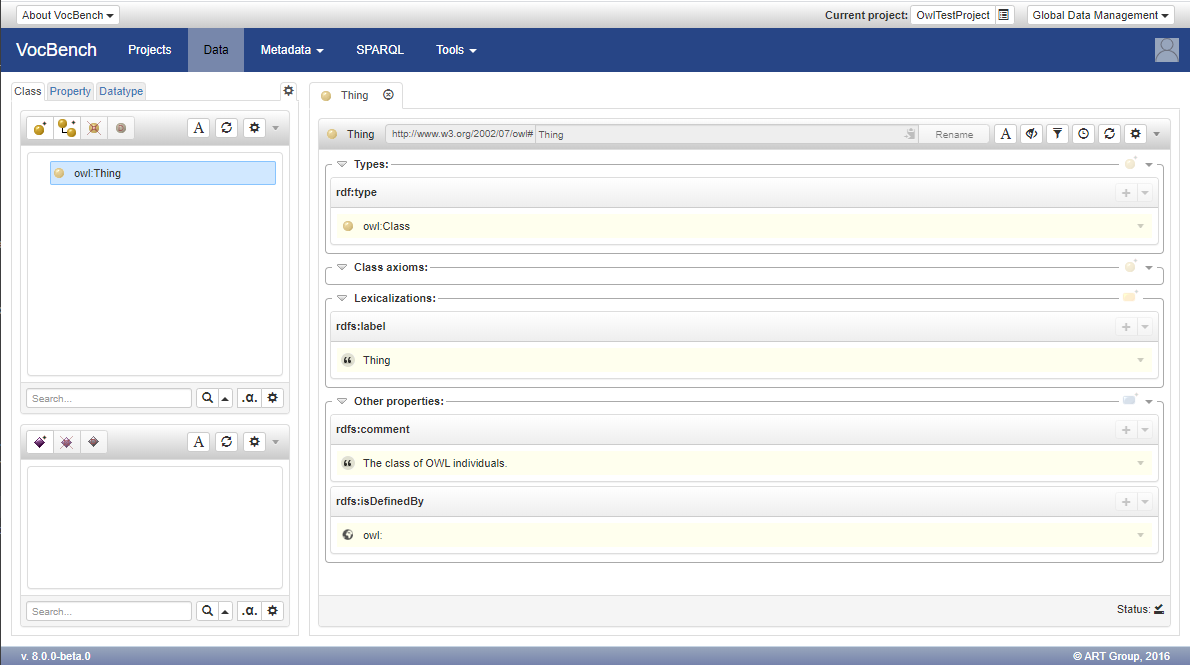
When editing an OWL ontology, the landing page for the Data View is the Class Section.
The Class Section (as of all the data section) is composed of two main areas: the structure on the left, and the resource view on the right.
The structure section of the Class-page
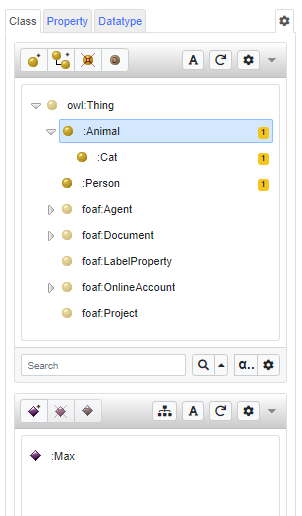
In particular, the structure section for the Class Page is composed of a Class Widget and an Instance Widget. The first one shows the tree of Classes in the current project, while the latter shows the list of instances for the class selected on the Class-tree Widget.
Available Actions on the Class-tree Widget
The following actions are available on the class tree through the three action buttons located on the top-left corner of the widget:
![]() Create Class: creates a new class as a root element of the class taxonomy
Create Class: creates a new class as a root element of the class taxonomy
![]() Add SubClass: adds a new class as a child of (rdfs:subClassOf) the selected class
Add SubClass: adds a new class as a child of (rdfs:subClassOf) the selected class
![]() Delete Class: deletes the selected class (not possible for read-only classes);
Delete Class: deletes the selected class (not possible for read-only classes);
![]() Deprecate Class: deprecates the selected class (not possible for read-only classes);
Deprecate Class: deprecates the selected class (not possible for read-only classes);
Additional actions
At the right of the classes-specific buttons, there are the standard ones:
- The Rendering Button
 activates the rendering for the class-tree
 - The Refresh Button
 allows the user to refresh the class-tree
 - A gear button
 , which allows to open the classes option menu
From the top-right context-menu of the widget, additional actions are available when a class is selected:
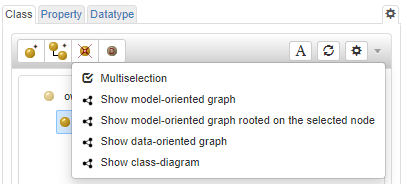
- Multiselection: Enables the selection of multiple resources (details in the Data View page);
- Show model-oriented graph: Shows the classes in a Graph View model-oriented (details in the Graph View page);
- Show model-oriented graph rooted on the selected node: Shows a Graph View rooted on the selected class;
- Show data-oriented graph: Shows the selected class in a Graph View data-oriented;
- Show class-diagram: Shows a class diagram;
Available Actions on the Individual Widget
![]() Create Individual: adds an instance to the class selected in the class-tree;
Create Individual: adds an instance to the class selected in the class-tree;
![]() Delete Individual: deletes the selected individual ( not possible for read-only individuals);
Delete Individual: deletes the selected individual ( not possible for read-only individuals);
![]() Deprecate Individual: deprecates the selected individual ( not possible for read-only individuals);
Deprecate Individual: deprecates the selected individual ( not possible for read-only individuals);
Additional actions
At the right of the instances-specific buttons, there are the standard ones:
- The Include non direct instances Button
 show the non direct instances as well
 - The Rendering Button activates the rendering for the instances list
- The Refresh Button allows the user to refresh the instances list
- A gear button , which allows to open the instances option menu
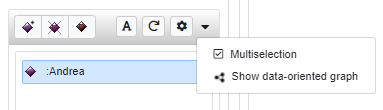
From the top-right context-menu of the widget, additional actions are available when an instance is selected:
Show Non direct instances
When selecting a class, all its explicit instances (instances that are defined having that class as rdf:type) are shown in the instance list.
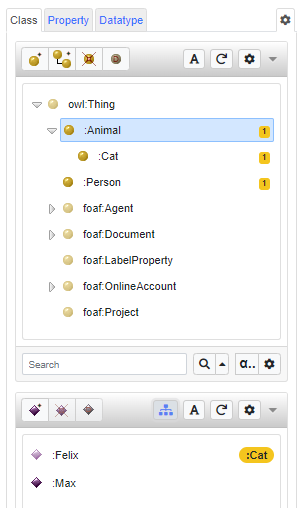
To see also the non direct instances (e.g. instances that belong to one of the sub classes of the selected class), just click on the "Include non direct instances" Button and these instances will be shown in the same instance list. Near each of the non direct instance, the Direct type of that specific instance (using its qname or the complete class IRI)
- Multiselection: Enables the selection of multiple resources (details in the Data View page);
- Show data-oriented graph: Shows the selected instance in a Graph View data-oriented;
Class Section Options
When the gear button ![]() is clicked in the class widget the "Class tree settings" window is opened
is clicked in the class widget the "Class tree settings" window is opened
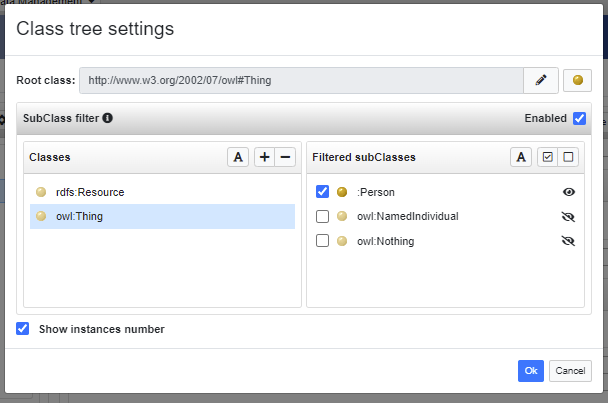
In this window it is possible to specify:
- Root class: which is the root class of the class-tree (the default value is owl:Thing)
- SubClassFilter: enable or disable to apply or not the following filters:
- Classes: The classes which should be visible or not
- Filtered subClasses: once a class is selected in the "Classes" list, which classes should be visible or not (in the figure, under owl:Thing only the class :Person should be shown in the class-tree, while the other two classes should not be visible in the class-tree)
Individual Section Options
When the gear button ![]() is clicked in the instance widget the "Class list settings" window is opened
is clicked in the instance widget the "Class list settings" window is opened
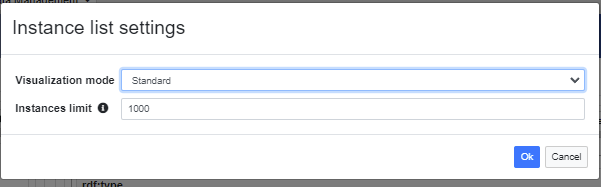
In this window it is possible to specify:
- Visualization mode: the possible values are "Standard" and "Search based" and selecting the former all instances of the selected classes are shown while the latter will show only the instances after a search (useful when there are several instances to avoid having problem with the UI)
- Instances limit: Set the maximum amount of instances visible in the list
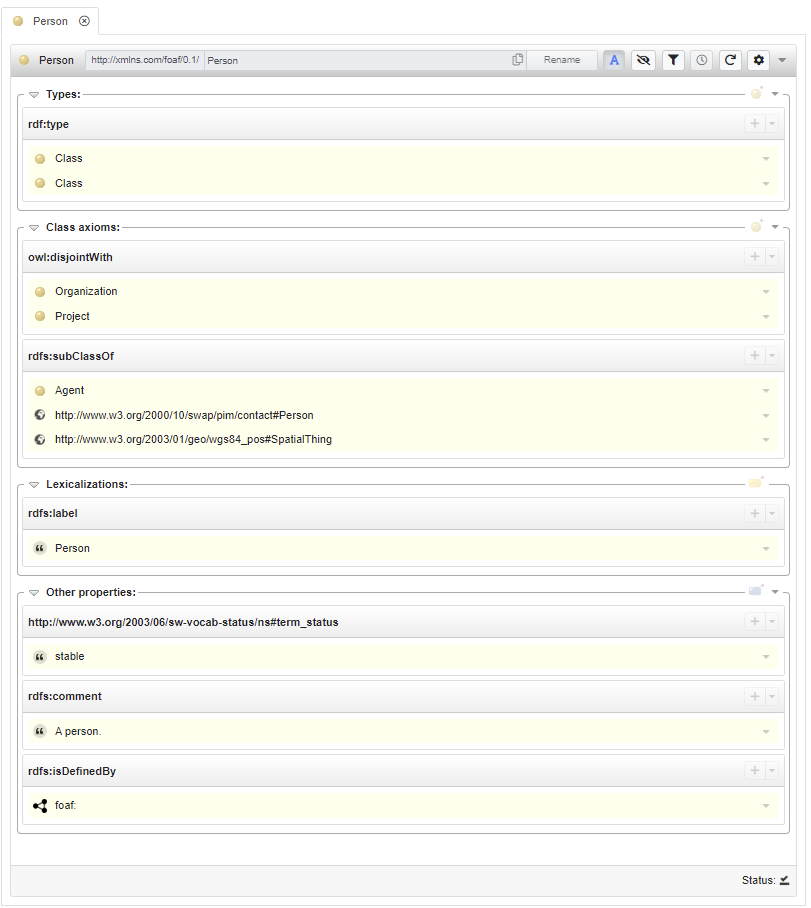
The Class-view
The resource-view for classes (or, simply, class-view) is divided into a few sections listing the following information:
- Types: most of the classes are of type owl:Class. However, some classes might have other custom (meta)classes as their definitory resources.
- Class axioms: this information is very class-specific. A class can be defined as owl:EquivalentClass or owl:subClassOf an owl:Restriction, that is an unnamed class intensively specifying the set of instances falling into its set.
- Lexicalizations: the set of lexicalization of the class for each language. The lexicalizations can be expressed through different models (rdfs:labels, skos or skosxl terminological labels) but are always presented here in a homogeneous way. Note: since SKOS-XL labels are reified, it is possible to click on them and open them on the resource-view. While this section hosts all kind of lexicalizations, it allows to create lexicalizations only according to the model specified when creating the project.
- Other Properties: any triple not falling in any of the sections above, is reported in this section
Adding a type
By clicking on the + button on the type section, it is possible to add a more specific type to class shown in the class-view.
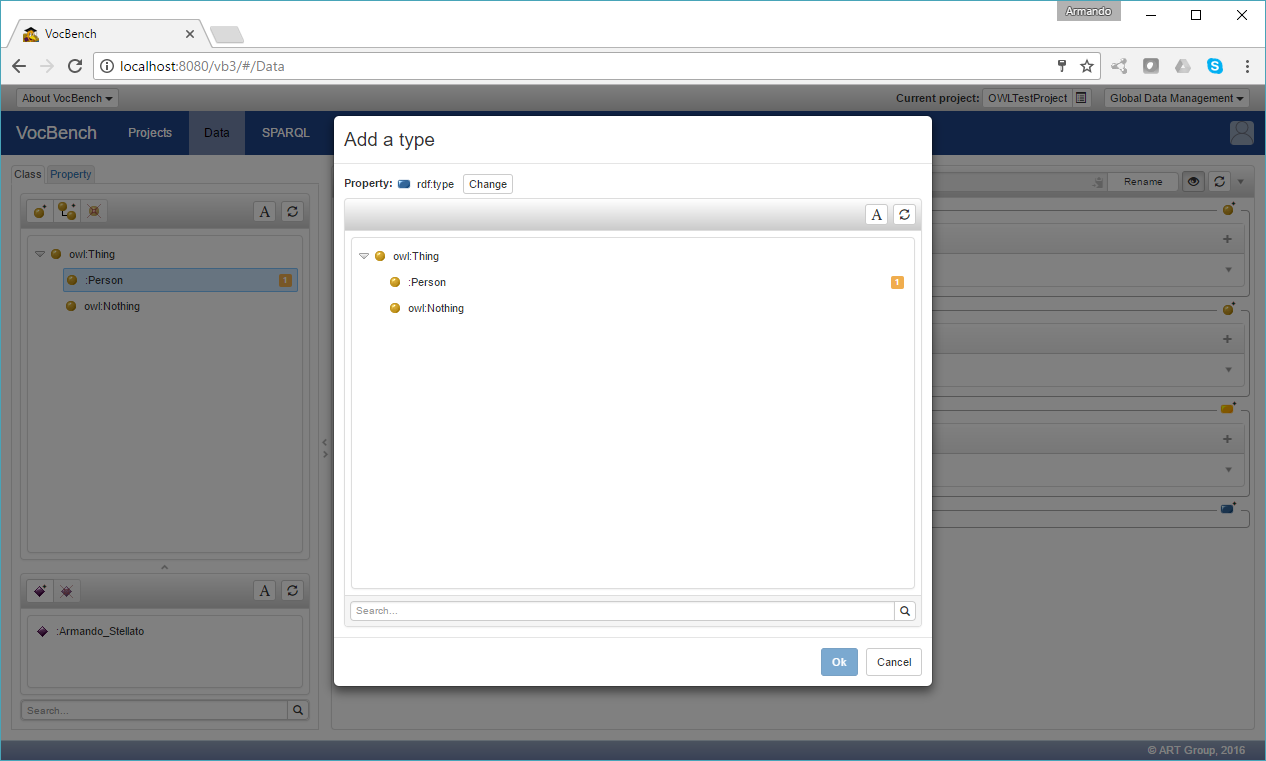
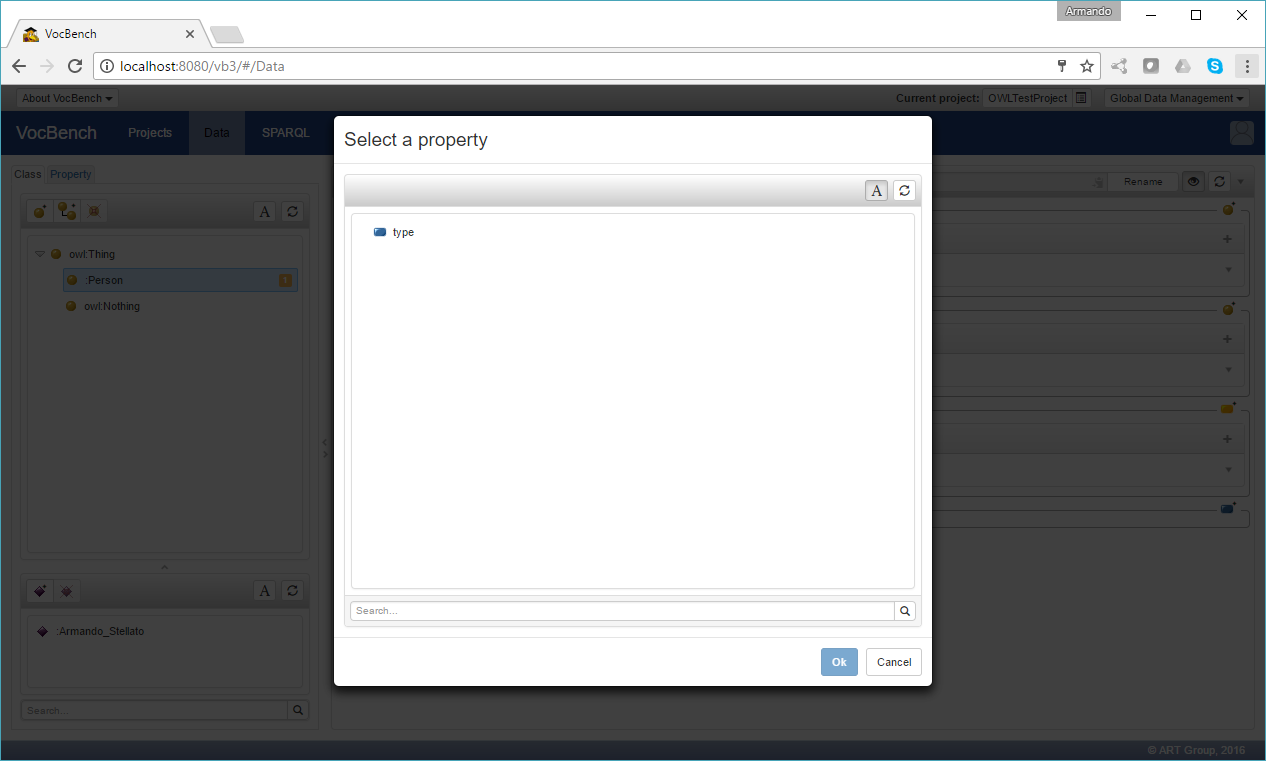
The property shown at the top of the dialog is hard-wired to rdf:type. However, in case the adopted vocabularies feature a subproperty of rdf:type, it is possible to refine the choice for the adopted property by clicking on the "change" button besides the rdf:type property.
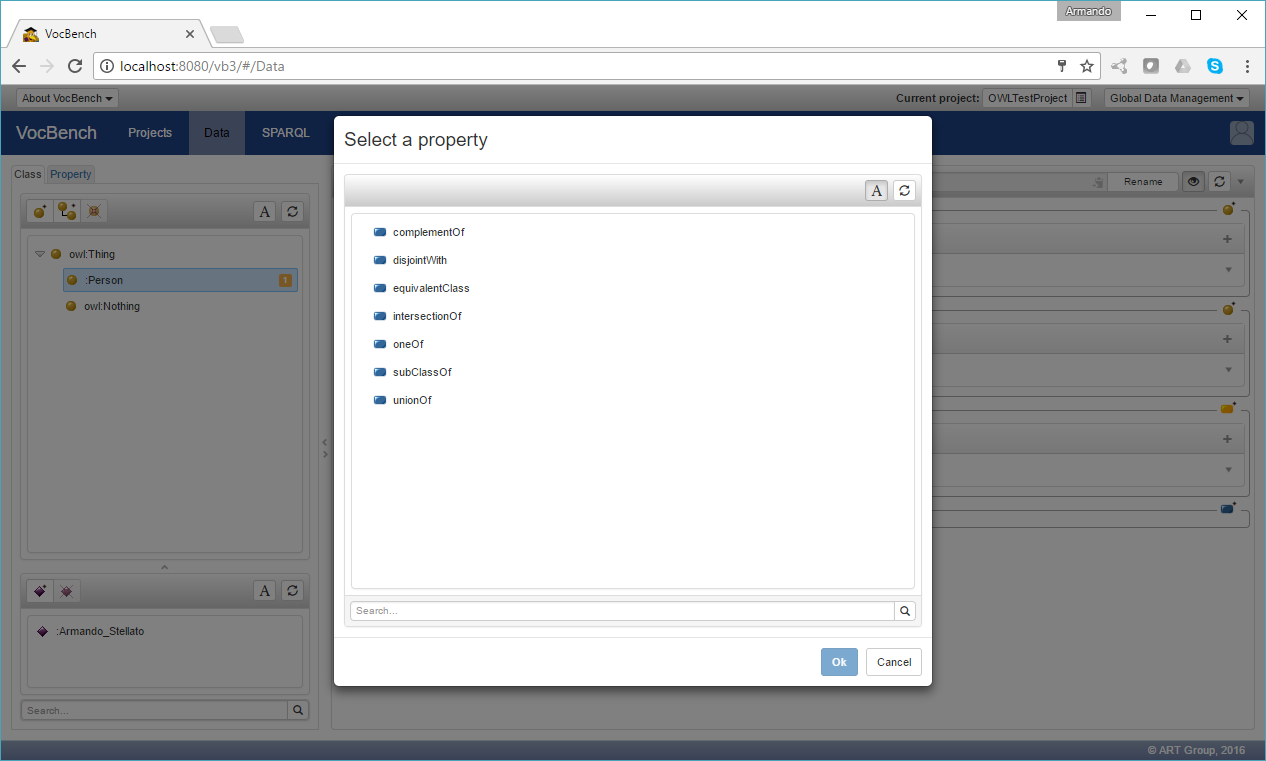
Adding an axiom
By clicking on the + button on the axioms section, it is possible to add a definitory relation with another class. A simple click on the ![]() button will prompt a dialog for choosing the relation to be used, as in the following figure:
button will prompt a dialog for choosing the relation to be used, as in the following figure:
while a click on an the + button on any already existing subsection of the "Class axioms" section, will directly reuse the property specified there, as in the following figure:
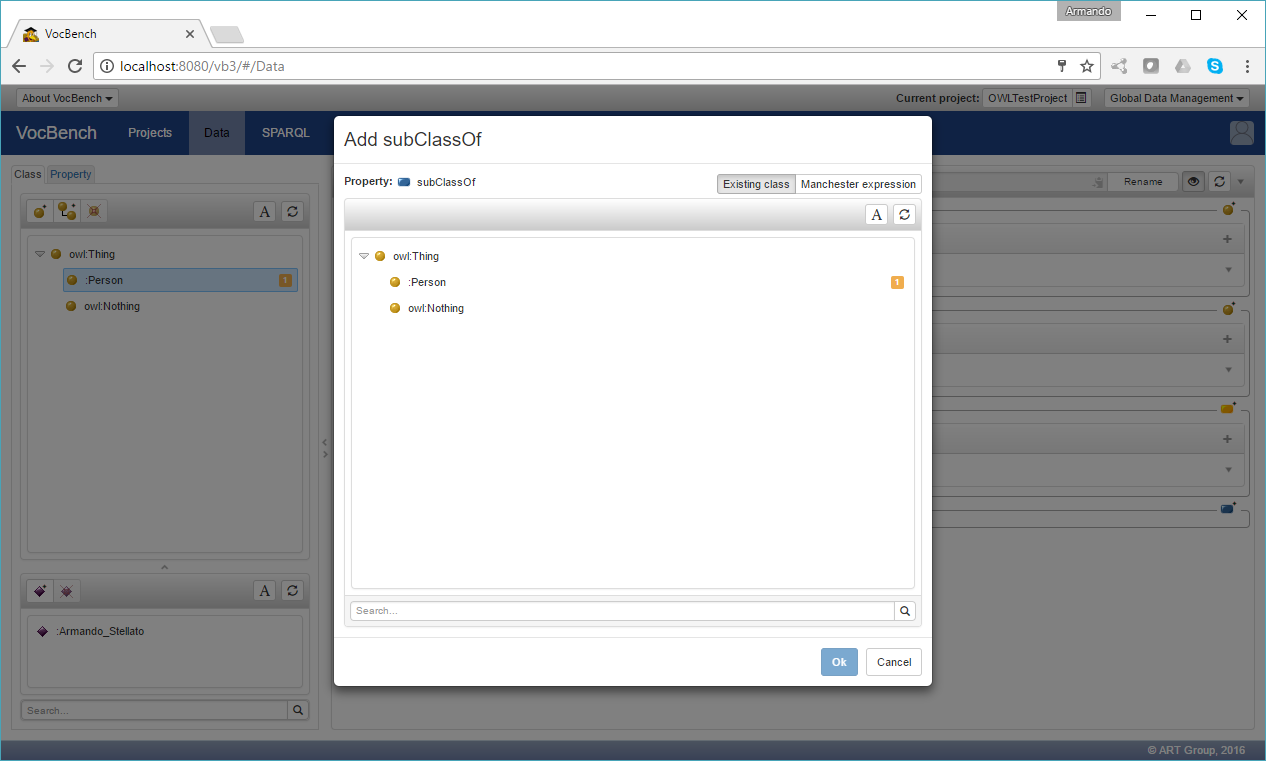
where possible classes to be connected through the rdfs:subClassOf property are being shown by using a class-tree. By clicking on the "Manchester expression", it is possible to define an owl:Restriction instead of referencing an existing class, as in the following (the property ":friend" has to be already present in the ontology):
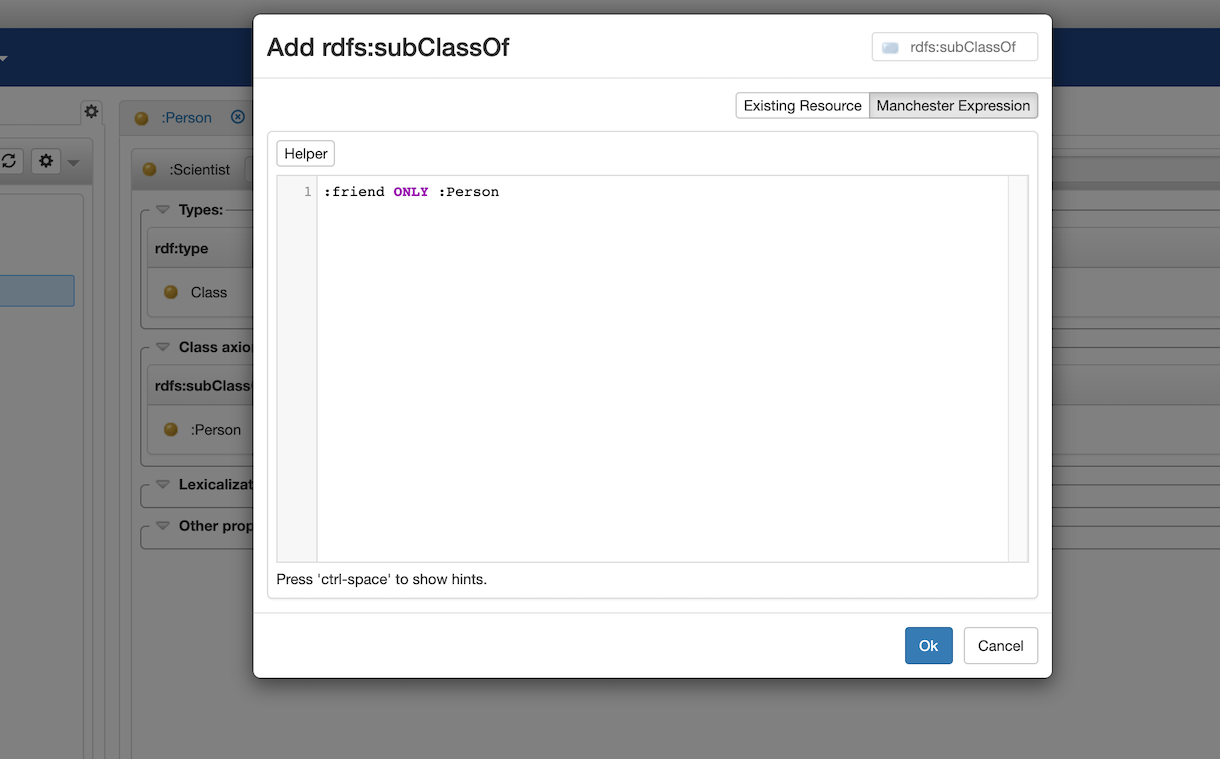
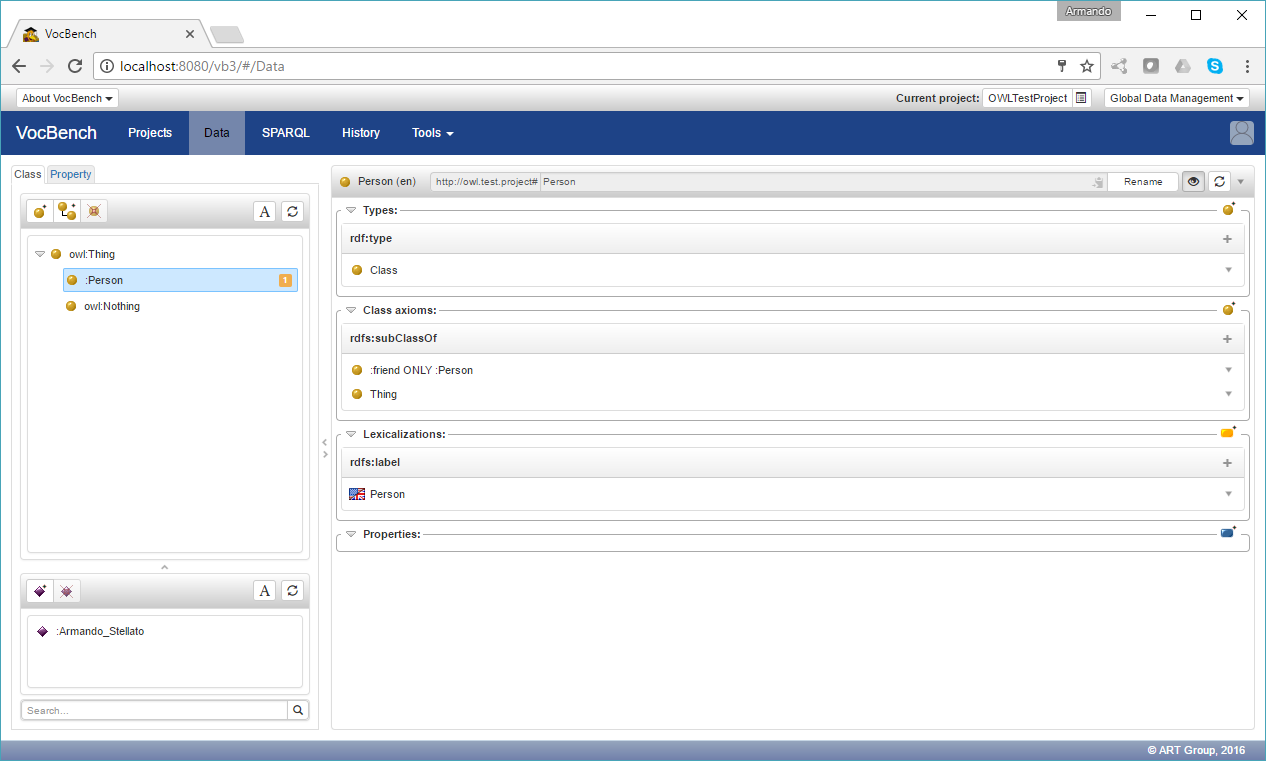
resulting in the following view, where the Manchester expression for the restriction is properly rendered.
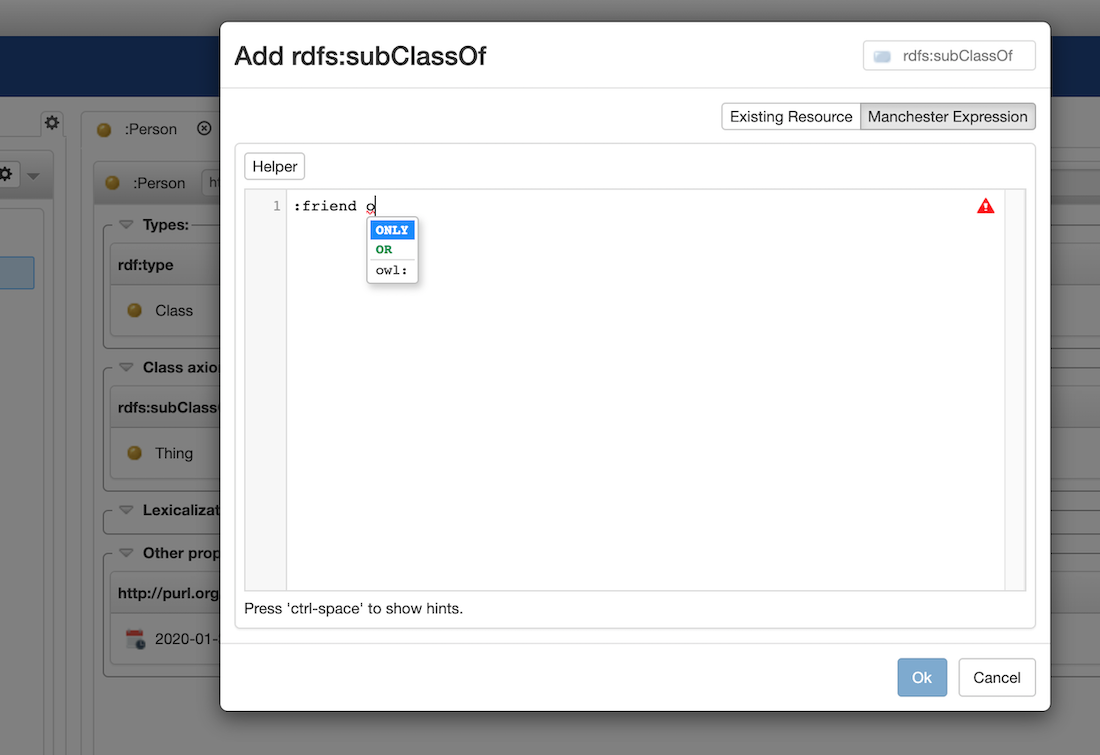
The Manchester Syntax editor supports syntax completion. The feature is activated by depressing "ctrl + space", as shown in the following figure:
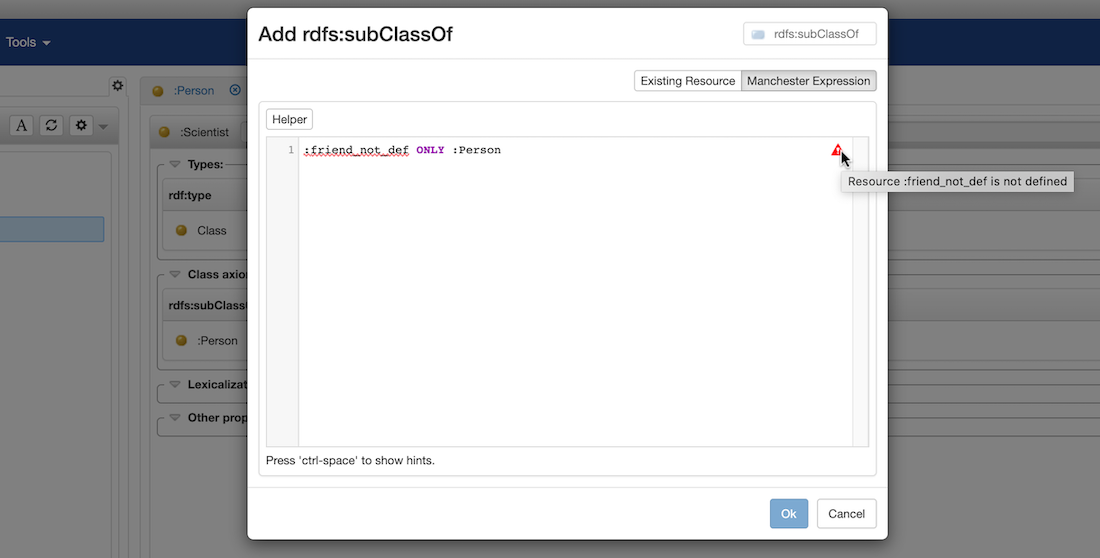
The editor also features an inline syntax checker. Here are some examples of spotted errors in the syntax:
- a undefined resource (a property in this specific case);
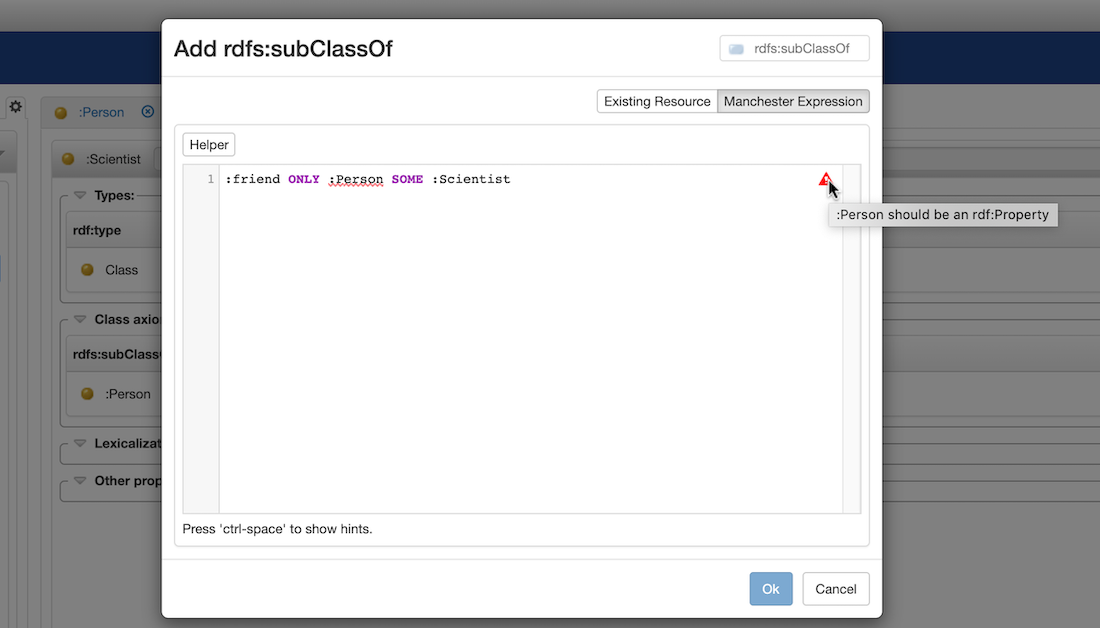
- an element in a wrong position
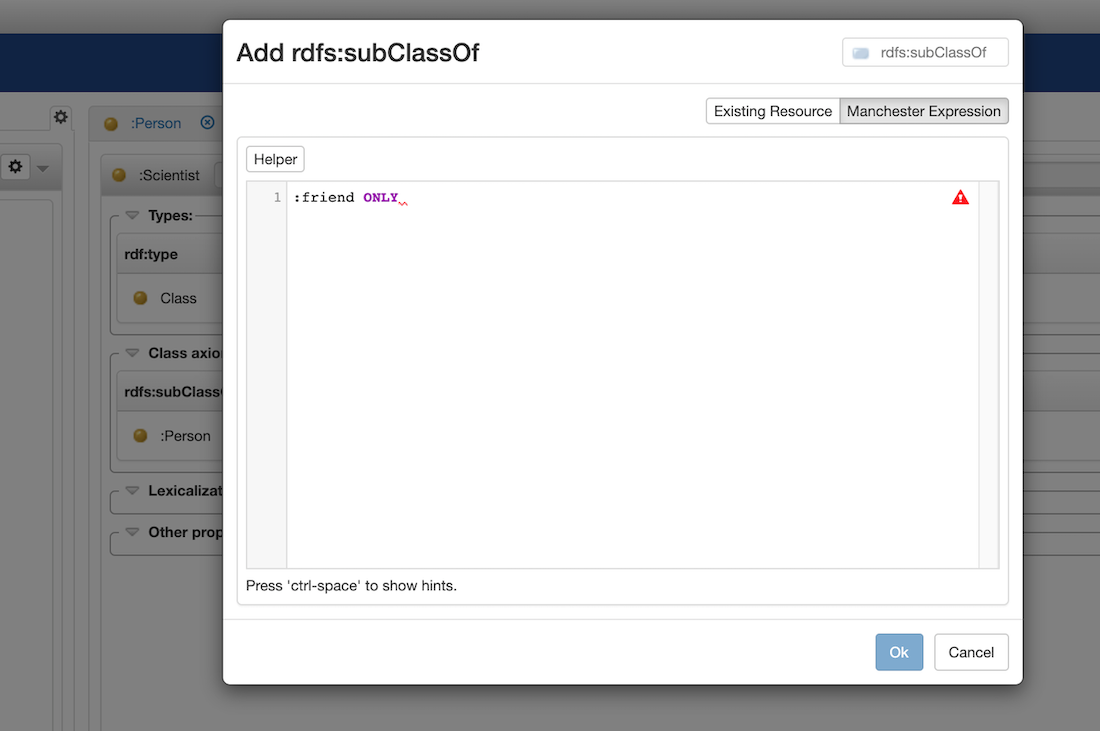
- an incomplete Manchester expression
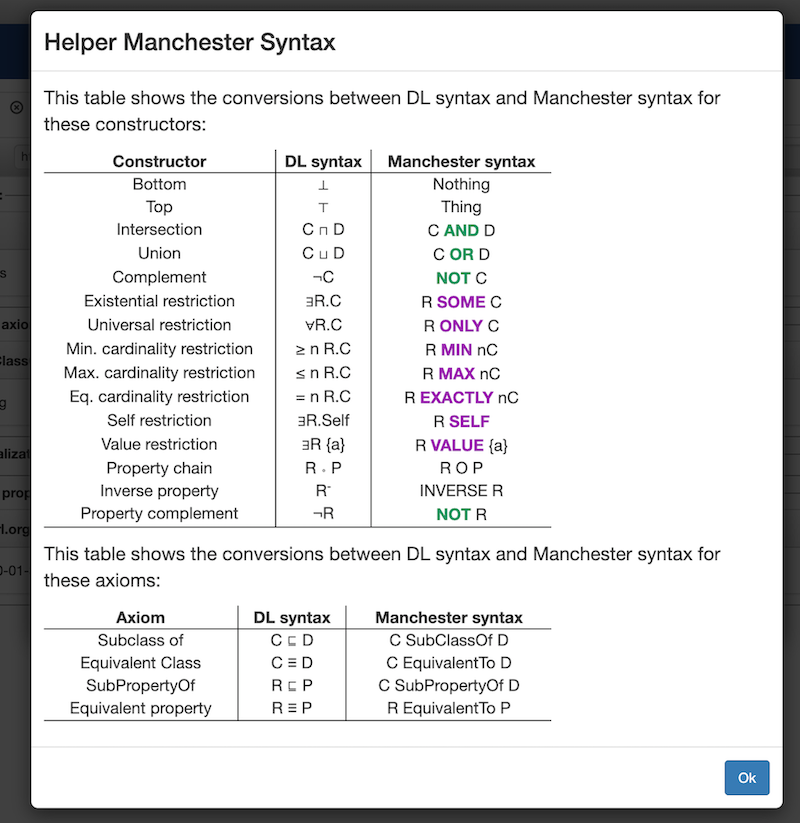
By clicking on the "helper" button, a 1-1 conversion table between DL syntax and Manchester syntax is shown:
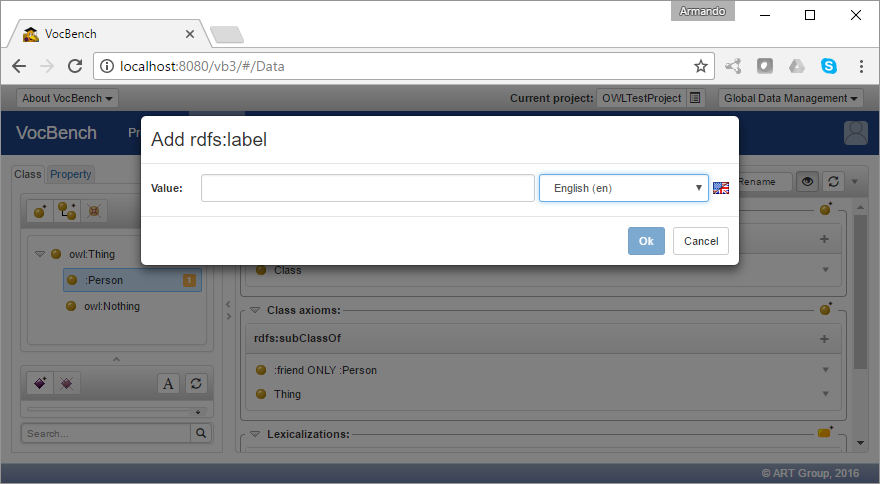
Adding a Lexicalization
By clicking on the + symbol on the Lexicalizations section, it is possible to add different lexicalization for the class, in different languages.
The Property Section
The Property Section (as of all the data pages) is composed of two main areas: the structure on the left, and the resource view on the right.
The Structure Section of the Property Section
In particular, the structure section for the Property Section shows a widget listing all properties in the ontology.
Available Actions on the Property-tree Widget
The following actions are available on the property tree through the three action buttons located on the top-left corner of the widget:
![]() Create Property: creates a new property as a root element of the property taxonomy
Create Property: creates a new property as a root element of the property taxonomy
![]() Add SubProperty: adds a new property as a child of (rdfs:subPropertyOf) the selected property
Add SubProperty: adds a new property as a child of (rdfs:subPropertyOf) the selected property
![]() Delete Property: deletes the selected property (not possible for read-only properties);
Delete Property: deletes the selected property (not possible for read-only properties);
![]() Deprecate Property: deprecates the selected property (not possible for read-only properties);
Deprecate Property: deprecates the selected property (not possible for read-only properties);
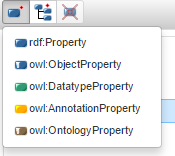
The behavior of the various action buttons is very similar to the one for classes, except that the create button for properties opens a submenu that lets the user choose the core property type to be used.
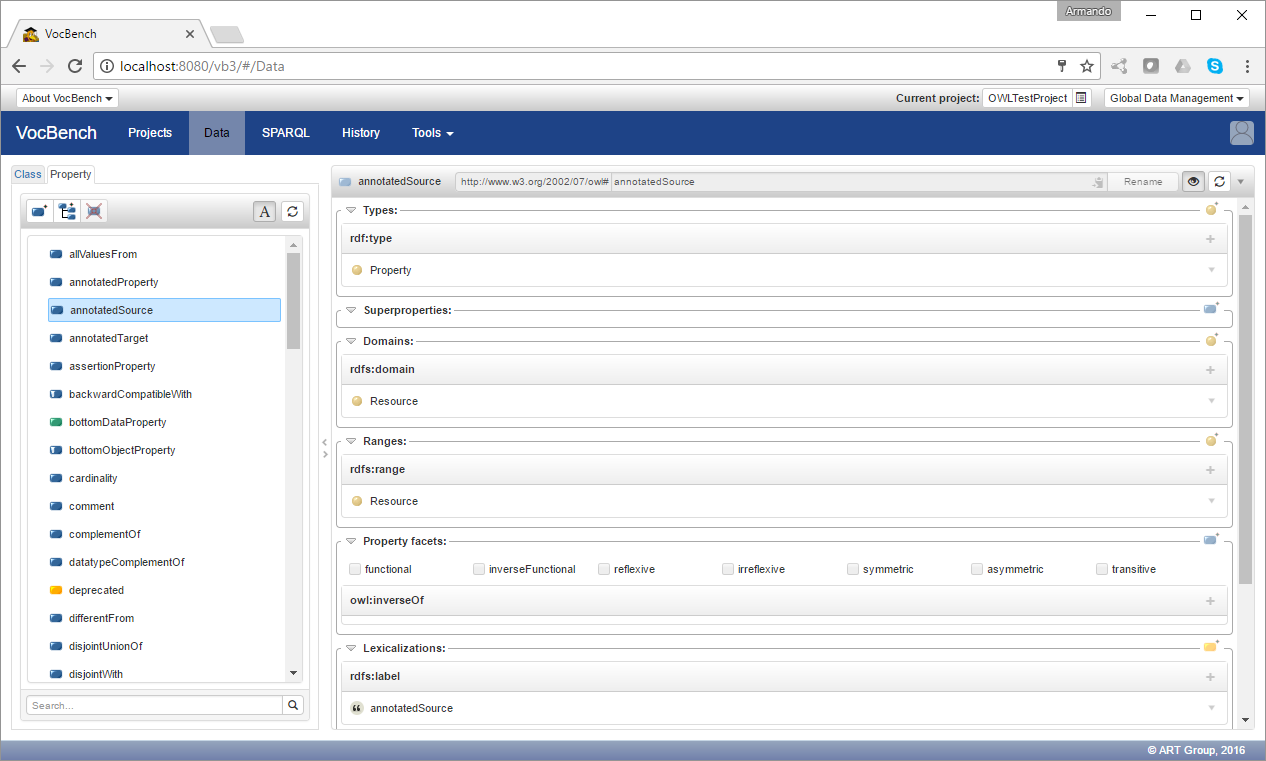
The Property-view
The resource-view for property (or, simply, property-view) is divided into a few sections listing the following information:
- Types: defines the rdf:type of the property, such as rdf:Property, owl:DatatypeProperty, owl:ObjectProperty, ...
- Superproperties: this section is property-specific. A property can be defined as a rdfs:subPropertyOf another property. This means that if a property p1 is rdfs:subPropertyOf a property p2, then for any relationship of the form: p1(a,b) it will hold that p2(a,b) is true as well.
- Domains and Ranges: these sections are property-specific and allow to specify domain and range for the selected property. Please refer to the OWL 2 Primer for further information.
- Property Facets: this section, property-specific, contains a set of characteristics of a property (usually called facets, and represented in OWL through specific classes) which can be activated by ticking on their associated checkboxes. Please refer to the OWL 2 Primer for further information.
- Lexicalizations: same as for any other resource being lexicalized.
- Other Properties: any triple not falling in any of the sections above, is reported in this section
The Datatype Section
Another panel available in the Data page is the Datatype one. In this panel there are represented the rdfs:Datatypes defined by the imported vocabularies and by the user.
Available Actions on the Datatype-list Widget
The following actions are available on the Datatype panel through the action buttons located on the header:
![]() Create Datatype: creates a new datatype
Create Datatype: creates a new datatype
![]() Delete Datatype: deletes the selected datatype (not possible for read-only datatypes)
Delete Datatype: deletes the selected datatype (not possible for read-only datatypes)
![]() Deprecate Datatype: deprecates the selected datatype (not possible for read-only datatypes);
Deprecate Datatype: deprecates the selected datatype (not possible for read-only datatypes);
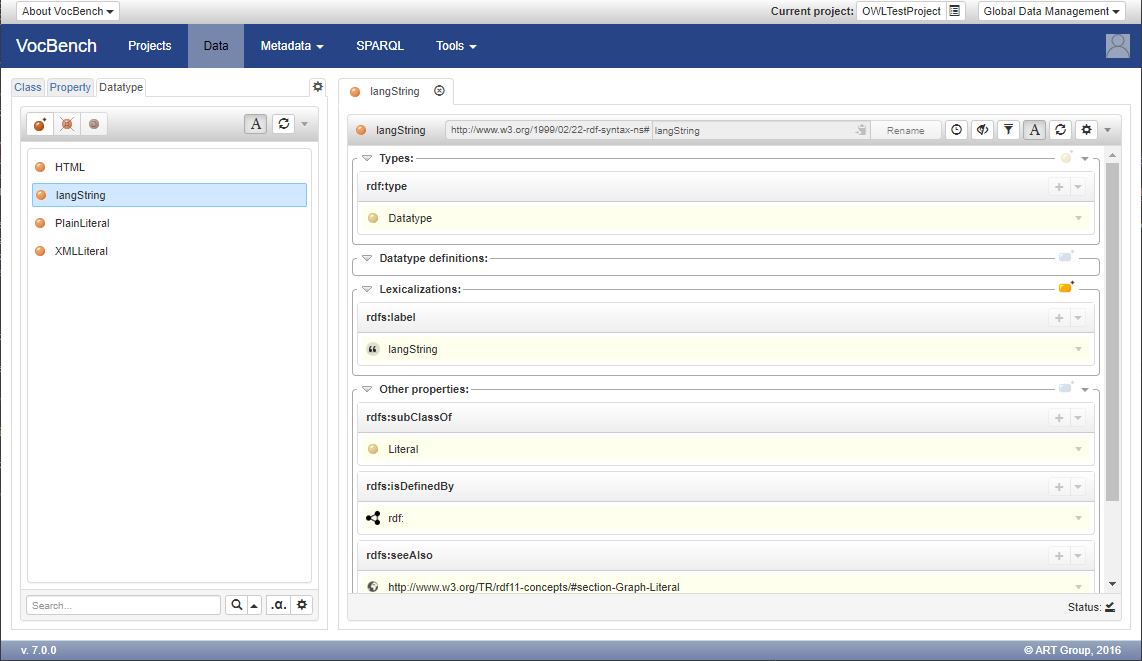
The Datatype-view
The resource-view for datatypes is divided into a few sections listing the following information:
- Types: most of the datatypes are of type rdfs:Datatype. However, some datatype might have other custom (meta)classes as their definitory resources.
- Datatype definitions: this section is datatype-specific and allows to define the core aspects of the datatype such as facets, restrictions, ...
- Lexicalizations: same as for any other resource being lexicalized.
- Other Properties: any triple not falling in any of the sections above, is reported in this section
Datatype editing
As stated in the previous section, the Datatype definitions partition allows to define facets, restrictions and other aspect of a datatype. Clicking on the add button of this partition, the modal shown in the following figure appears.
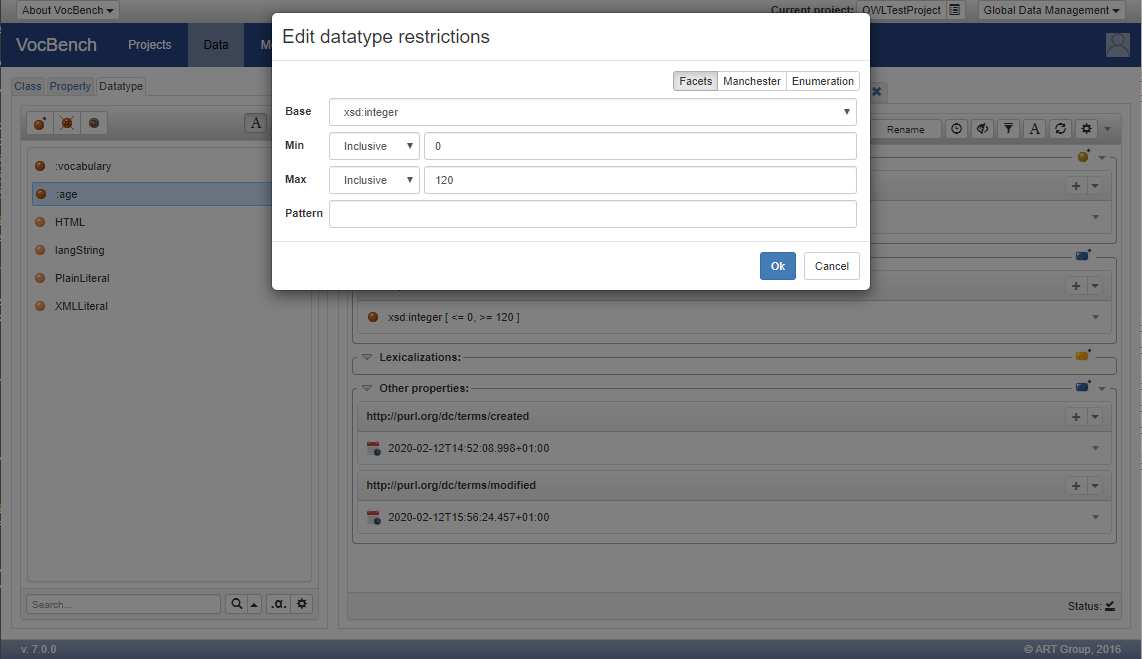
From this modal it is possible to define the facets of the datatype specifying the base built-in data type and optionally a minimum and maximum value and a pattern for the validation of the defined typed values.
In the previous figure it is defined, as example, a new datatype :age based on xsd:integer, which range of values is between 0 and 120 (both inclusive).
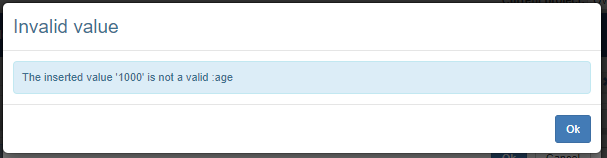
In this way, when the user tries to create a value for this datatype, a validation check is performed on the entered value. For example, if the user enter an age of 1000, it will get the following error.
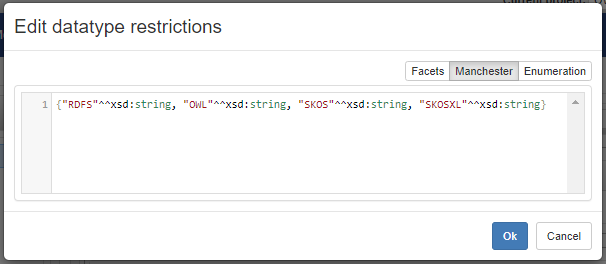
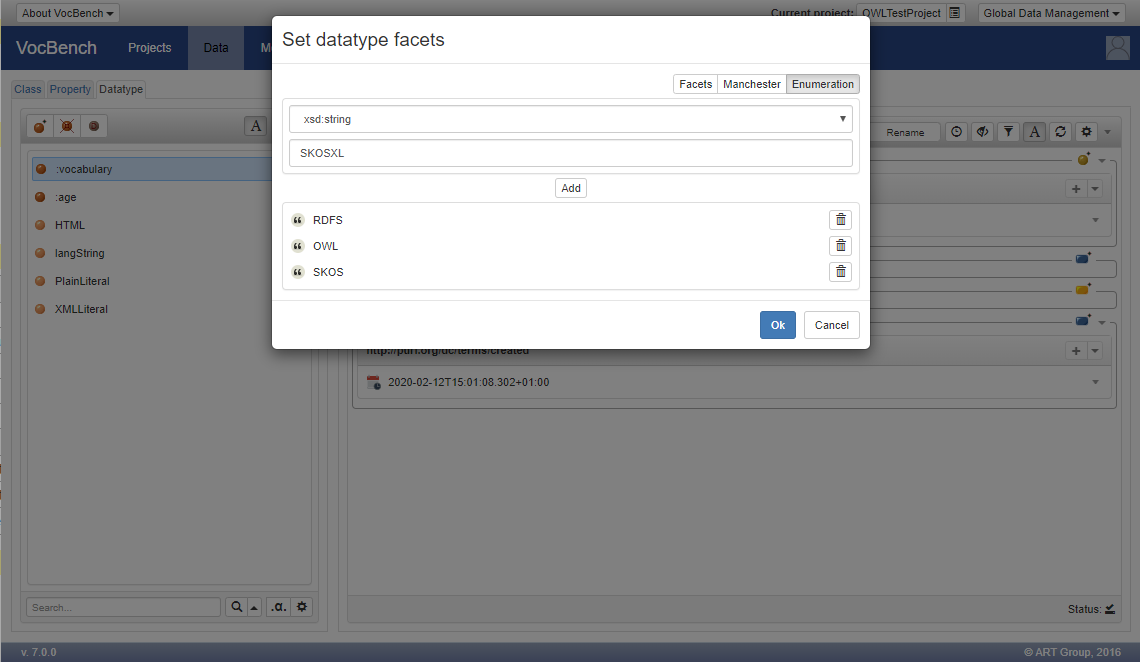
Beside the customization through facets definition, a datatype can be defined through enumeration, namely a set of allowed values that the datatype admits.
Finally, a dedicated editor is also provided in order to define datatype aspect through the Manchester syntax.